Welcome to Imigence!

-

Fall To The Darkside
This has been the most ambitious personal project I’ve taken on to date. It combines some of the art techniques that I’ve dabbled in over the years and though I’m satisfied with the results, I guess it’s up to the critics to determine whether it’s up to scratch.
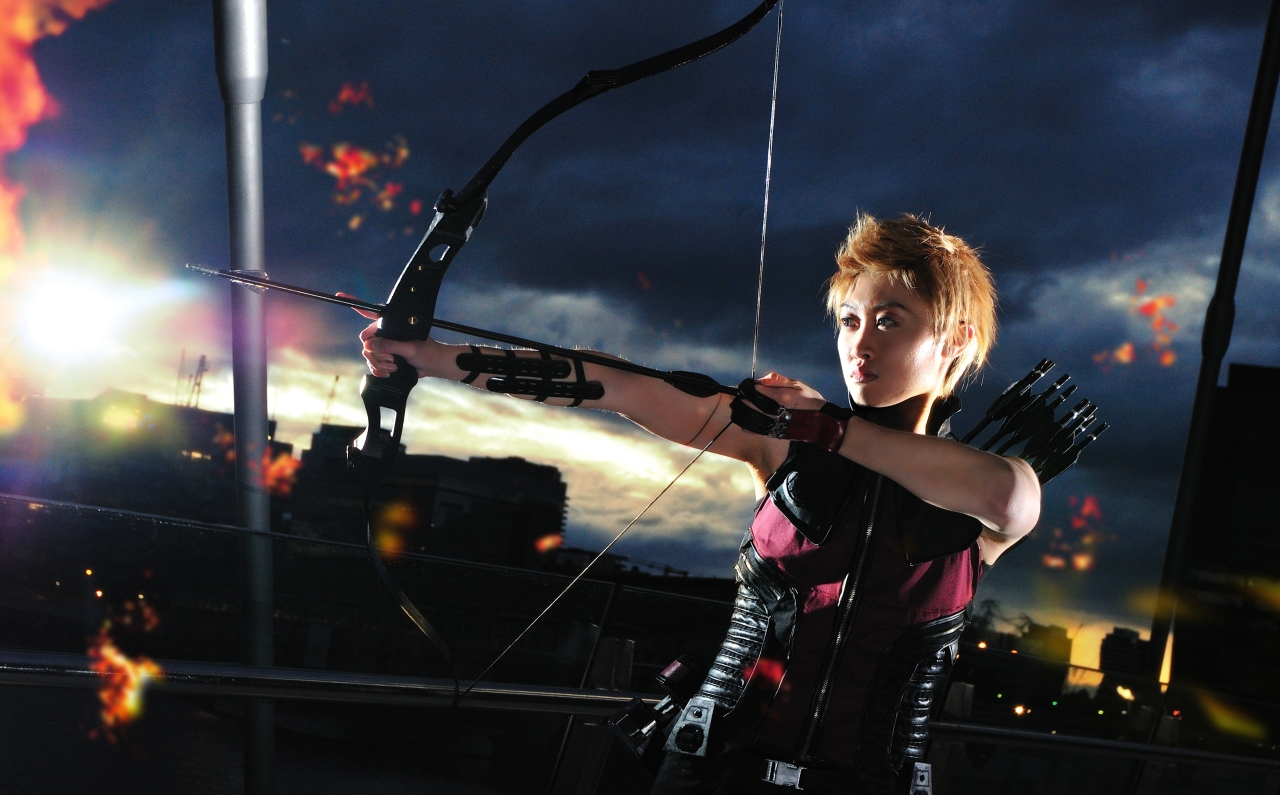
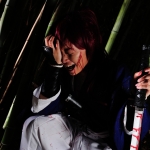
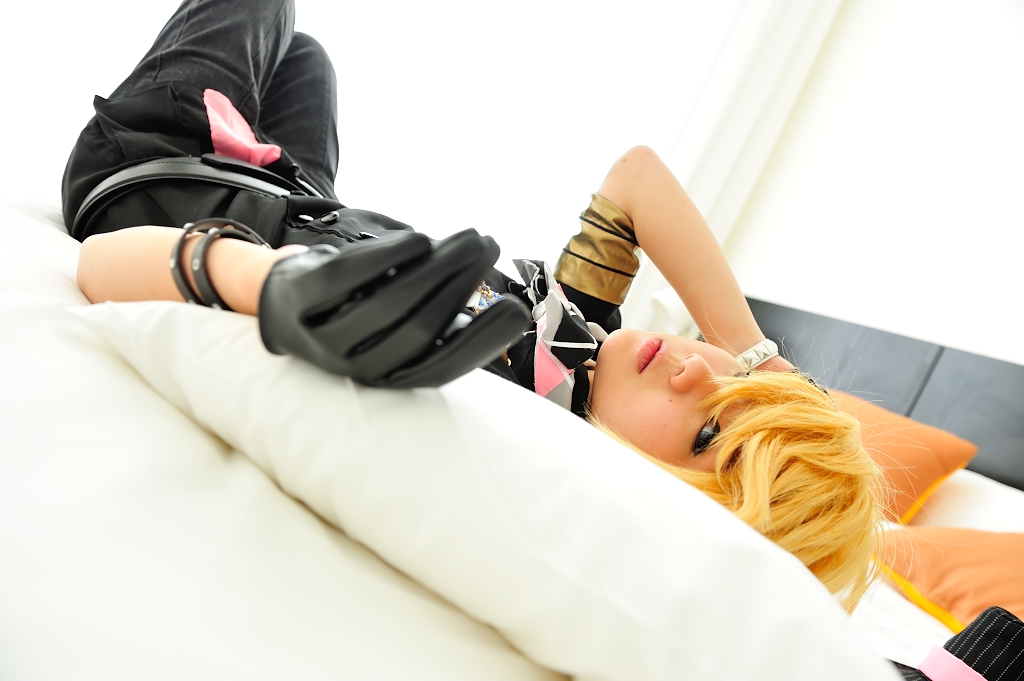
Firstly, the photography, specifically cosplay photography. I wanted to keep this under wraps for as long as possible so I guess asking others to model for me didn’t really cross my mind. So the two figures in this picture are both of me.
I’ve pretty much treated this project as a prototype and although the subject of the picture itself is required, it is not really important in terms of accuracy. This means the Jedi “costume” I’ve worn was just thrown together from clothes I already had (yukata, hoodie, etc). I aimed from the start to mask a lot of it under shadow so that it will be a passable enough Jedi look. The slumped figure in the back again was me wearing equally mundane clothes as I figured that part would be out of focus anyway. The lightsabre itself is an authentic Force FX lightsabre but I still had to enhance it a bit in Photoshop.
I took rough guess of the angle and distances that I was viewing the scene from when I was setting up the camera. The accurate way of doing this would have been to match the camera angle and focal range from the 3D scene shot into the real world and properly measure the distances between camera and subjects but again, the aim of seeing what was possible took precedent over exactness. Lights were set up to ensure more rim lighting than key lighting to get more shadows.
One detail that I had to consider was the differing strength of each of the rim lights. In the final scene, I had in mind showing something blowing up outside the windows of the throne room. The light from that ought to have an effect inside, so the placing was key to ensure believability.
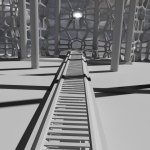
The 3D throne room was perhaps the most daunting part of this all. I’ve worked on 3D animations in the past using the open source editor Blender 3D. It’s been years since I’ve last made anything in 3D and Blender has since moved on to later versions. It was tricky at first trying to remember the controls but eventually I did get back to the swing of things and I remembered just how enjoyable it was.
Constructing a 3D scene isn’t all too complex. What is problematic however is making it look realistic. This involved trying to figure out materials and textures that reflect light correctly. Ambient lighting also has also a major hurdle specifically as I had to make sure the shadows and reflections would match with the real world cosplay shoot I was doing.
Something else that I hadn’t done (besides experimenting with it) had been employing ray tracing. Basically it’s a technique that simulates how light behaves in real world in the program. It means objects in the scene can reflect the light on their own, shadows are blurred at the trailing edges due to scattered photons interfering and other nifty things that we just don’t think about in our daily lives. The glass windows were particularly challenging but they were well worth the effect with the result I achieved in the end.
When combined together, the greatest challenge is in choosing which degree of realism to take. I could work a tonne more to develop the textures in the 3D environment to look more life-like or I could photoshop my visage to look more like a video game character. It’s the balance that’s essential to pulling this off. At the end of the day, what’s more important is that I’ve learnt quite a lot with this experiment and I’m hoping to put this to good use in other upcoming projects!
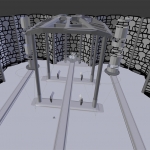
(a) Screen capture of the throne room and (b) the first test render.
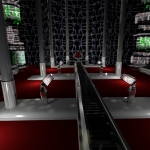
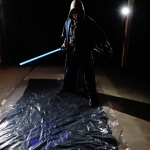
(c) Employing the textures and lighting. (d) Costume shot; plastic floor was for reflection.
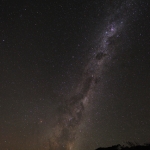
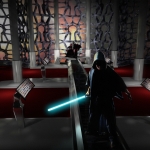
(e) Shot of the Milky Way that was used for background. (f) Composite final image.
Quick background story; this shows a Jedi who has just begun his fall into the Darkside. His blade is not yet the familiar red as this is his first evil act which is killing the authority figure in the background.
-

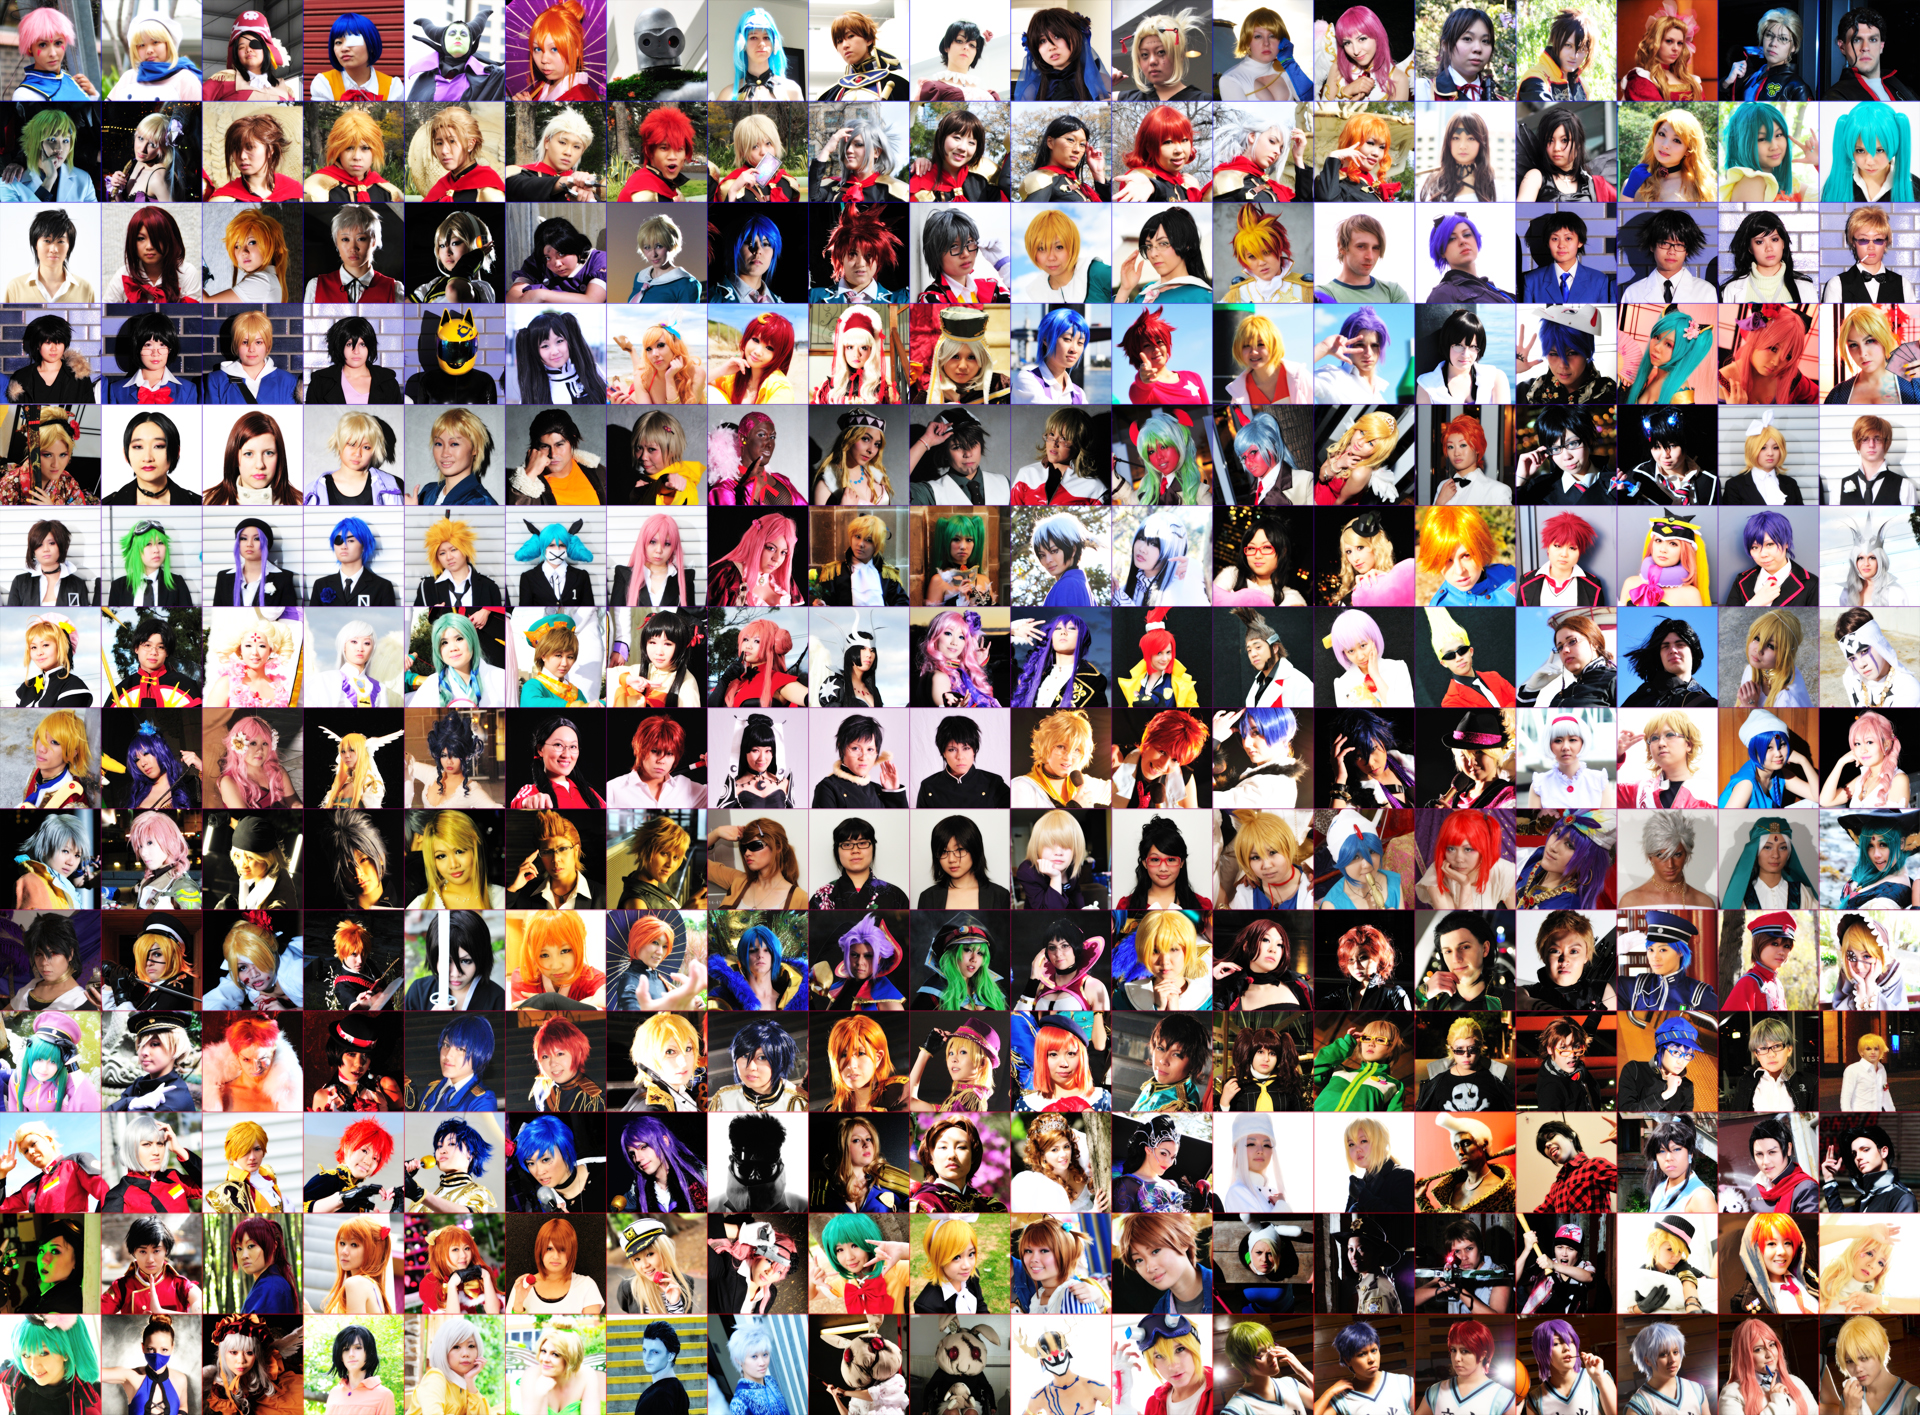
Cosplay Mosaic
The first of these pictures date back to 2009. As with everything else in my photography history, I never really searched out the opportunity to do these shoots; they kind of just happened. Fast forward 4 years later and I find that cosplays have become my most often photographed subject and many of the shoots still remain impromptu events.
There are 266 cosplay characters shown here. There are a few shoots which I didn’t include because they were either of people that I didn’t know that well (i.e. just did the shoot as a favour to a friend) or I was not the main photographer. There are also some costumes that I didn’t include because they were re-shoots of the cosplayer wearing the same costume. At the same time, there’s also some photos here which weren’t from a pre-planned shoot which I just didn’t want to leave out.
I wanted to do a bit of a school photo style compilation but with the varying poses and angles often peppering the eclectic style in cosplay, I soon found it a very difficult task to find shots where the person was faced full forward. In the end, I settled for just having them at least staring right at the lens. I also thought about either grouping the shots for each cosplayer so they can see their progression over time or grouping the same characters (I’ve shot quite a few Mikus and Wakos) but I think showing it in chronological order makes more sense.
I just want to thank all of the cosplayers that I have met and have become friends with over the years. You are all awesome!
Click image below and expand to full view.
-

Favourite Photos 2012
Finally, my 2012 favourite photos compilation is complete! I had hoped to put this together much earlier but there was a backlog of photos to back up and I didn’t want to start this until everything I’ve worked on over the past year was accounted for to make sure that I didn’t miss on a single shot. I took somewhere around the vicinity of 20,000 photos this time around which is about a third of how much I took in 2011 so I can definitely say this was a much quieter year. That said, I think it was one of those years where I probably grew more as an artist because I was a lot more focused on making good shots instead of just making a lot.
Again I want to preface this list as being my favourites. They may not be technically or artistically the best but for me they are photos which have struck a chord in me. I hope they invoke something inside you too.
#1 Ending Moments
This was obviously a heavily manipulated shot as took this out in the field in the middle of a game. I just thought I wanted to isolate and somehow capture what was going on in Andy’s mind at the time.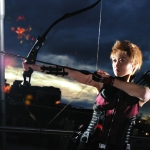
#2 Hawkeye, Crux and Itami
I like Hawkeye for technical execution, Crux for atmosphere and Itami for emotion. Whichever way you look at them, they’re just things that make you go, “whoa”
#3 Chie, Passing Moment, Dream Concert and Christmas Asuka
Just like last year, I think these photos could have easily been part of my #2 list. They highlight a moment, either in my life or in the scene we were trying to capture and it just makes me sit back a bit, reminisce and enjoy that moment all over again.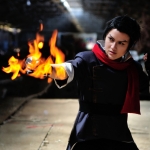

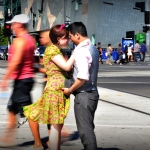
#4 Mako, Roshan & Family, Tram Stop and Backstage
Honorable mentions that I couldn’t just take away from the list. It’s tough trying to whittle down a selection of things you like and sometimes you just have to give in! -

Welcome & Wai-Con Report
Honestly, I didn’t think that I was going to be upgrading my website so soon given that it’s only been a year since I last tinkered with it but I guess it’s always sort been in my mind that all my previous websites could have been coded by high school students and that I think it’s about time I opted for something that looked more professional. And here we are!
At the moment all that I’ve really done so far is migrated some of the recent things I’ve written and released but what I’m expecting to show here will be some of the more interesting projects I’ve done. Hopefully my folio will be a lot more interesting to all the visitors. But for now I guess I want to start by doing a quick rundown of my trip to Perth for Wai-Con 2013 a couple of weeks ago.
I’ve always wanted to visit Wai-Con since its first year in 2004. It was the first time I’ve ever submitted my anime music video (AMV) to any convention’s competition and obviously I was quite anxious about this one. It never occurred to me that I was going to win back then with my video “Talk To Me”. So you can say that because of that, Wai-Con has always had a special place in my heart despite never having visited it before. Without it, I’m sure I would never have gathered the confidence to push on and be where I am now.
We arrived in Perth on an almost 4 hour flight but given the timezone, it was still somewhat early in the evening there when we landed. Mel and I first drove off to her hotel right beside the convention centre. First thing I thought about was just how quiet the city was for a Friday night, having come from Melbourne however as we drove deeper into its heart, it actually got quite a bit lively.
The convention started the next day and despite the badges not arriving in time for the convention, the lines outside were probably no more than what you’d expect in any other convention in the country. Through the day I met with Janey, Ash, Cate, Min, Jill, Wilson and of course Mel and as usual, the cosplay gang has always been a big highlight of the whole con experience. Just hanging out with them was awesome enough on its own.
Probably one of my most thrilling experience on the Saturday however was finally meeting Vincent. I’ve known him pretty much for as long as I’ve known Wai-Con because we’ve been part of the same AMV studio all this time. It took us 8 years to finally meet in person and we did so while hosting the AMV panel. Ever since retiring from competitions in 2011, I haven’t been all that active in the AMV scenes anymore but it was a very nostalgic moment being up there on the stage again explaining the nuances of AMVs and reminded me just how much I still love this hobby.
We hung out for a while longer after that but inevitably my focus turned towards photos hoots as the day neared its end. We conducted a rather quick shoot back in the hotel room with Mel and Jill dressed in attires from Uta no Prince-sama. The next day we also did a shoot for their Macross Frontier attires and as usual it was a lot of fun. I’ve worked with Jill in the past but this is the first time I’ve really done a more personal shoot with her. It’s always fantastic to get to know people just a little bit better and this certainly is why I’ve become so engrossed in this art more than ever.
In between all of that we just lots of laughs over food and lounging around in the hotel room. Given how hot it was that weekend, you’ll forgive us for wanting to stay indoors as much as possible. I was also very thankful that Jon and Leah had been such great people for letting me stay on their couch during the con. If there’s a next time, I really ought to take a bit more time out because I definitely needed to catch up with them more than I did. It was also a bit saddening to see John Robertson’s last performance in a convention in Australia but definitely happy for him moving on with his career.
The Perth people have often come to us in the eastern states because the conventions here were always bigger (and arguably better) but I was definitely not disappointed that I opted to try things the other way around. Again I made new friends and caught up with the old and from this experience, there’s certainly a high chance that I’ll be coming back next time!
-
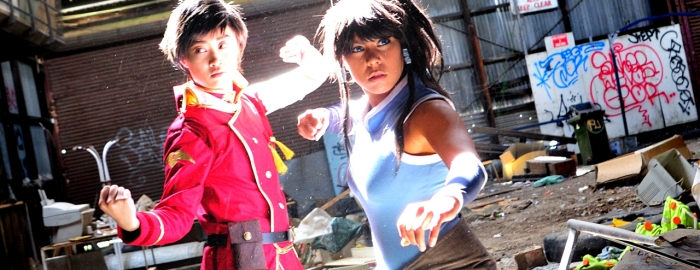
Bending Time
For a moment I didn’t think this shoot was going to happen but finally we’ve been able to do an Avatar: Legend of Korra shoot with a fantastic team that I’ve always loved working with. Now what made this shoot exciting wasn’t exactly the cosplays themselves; heck besides Mel’s glowing steampunk gauntlet, most of the costumes weren’t super extravagant. No, what made it interesting was the decision to not overly rely on post processing to come up with the effects but to actually do them for real.

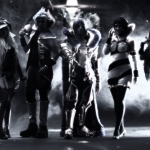
 Darcy as Tahno and Lisa as Iroh
I had thought that water effects shouldn’t be too complicated; just throw buckets around, I thought. But when it came time to take photos of it I realised we needed to take into account the volume of the body of water being thrown, how close we can get it to the cosplayer to make it look like they’re controlling it (without soaking them in the process) and the background lighting/surfaces (anything bright just washes out the transparency and the angle of incoming light just had to be right to make sure the water’s rim is lit up well). So yes, there were many takes to get this right resulting in muddy ground afterwards!
But if water was a challenge, fire was downright dangerous. Commonly you’ll find in the internet people lighting up canisters of hairspray; bad idea as they are pressurised and will explode. So after a few more research, we stumbled on the idea of a small birthday candle near the nozzle of a squirt bottle – filled with alcohol. It’s a one shot system instead of the continuous fire with hairspray but it was far safer with less risk of the fire snaking its way into the alcohol which also evaporates quickly. That said during the testing we conducted a couple of months ago, some hair was sacrificed; my fault completely and really emphasized for me, more than anything, the need for safe practices.

 Aly as Mako and K as Korra
Not covered in the current releases are earth and air bending powers. We didn’t really focus on air and any releases on that with the standard poses we took will more likely rely more heavily on post processing effects. We did briefly touch up on earth (our own interpretation of sorts) and the results were actually suprisingly pretty good. Above everything else, the live nature of all these attempts at effects yielded works with more emphasis on action – something I’ve always really wanted to do more of.
Being able to work with a dynamic show with lots of possibilities was excellent. Shooting some of the best cosplayers around was even better. But the icing on the cake was the location we stumbled on. When the group came up to me originally, they described to me the world of Korra as being a bit industrial and maybe a bit crumbling. There were a lot of less than wholesome locations all around Melbourne that could have suited this but there was always the problem of all of them being too far. I had actually rejected going to places where there was security presence but in the process of going to a place which was practically public land, we found this unassuming shed which was ultimately perfect for what we needed.

 Mel as Asami and the group in front of the hidden back rooms of the shed
Most of my shoots have always been fun; I almost always take shoot opportunities when I know I’m going with people I’ll have fun with even if we have to make our own fun in the process. Experimentation and discovery really do add to this element of enjoyment and I’ve loved working with people who felt the same!
-

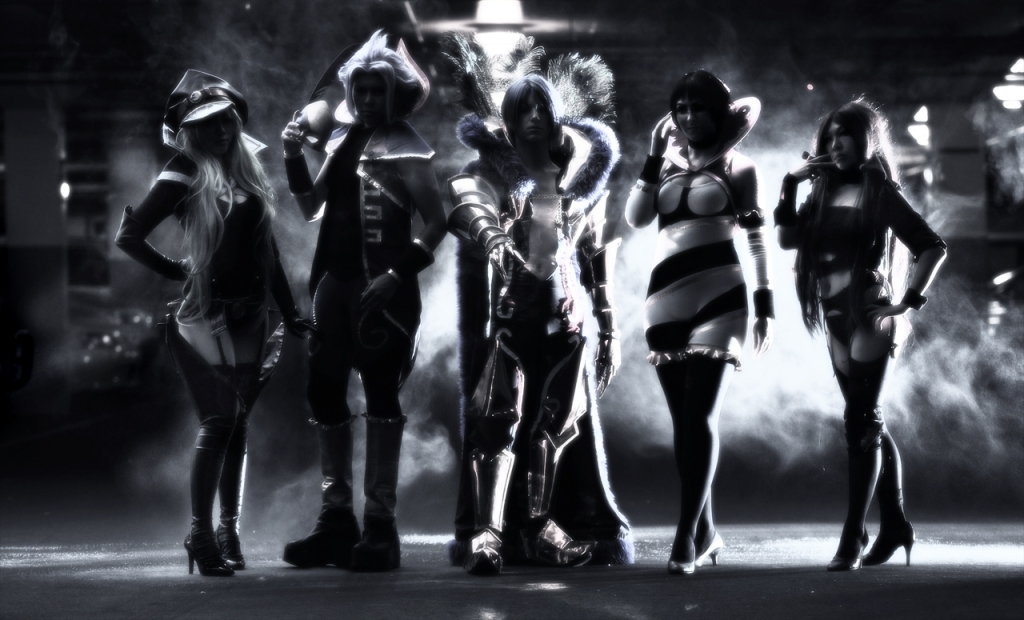
Cosplay Photography History
Manifest was a couple of weekends ago now and my report for Anime News Network AU has since been published so if you want to read up on our experiences and impressions click here now. The purpose of this blog post though is more to focus on the idea of convention photography and how it has evolved for me.
I think it’s fair to say that convention and cosplay photography constitute a big chunk of the work I do. Rummaging through my collection of convention passes, it dawned on me that I’ve been attending cons for almost a decade! That said, it’s only been in the past 4 years that I can say I’ve been doing cosplay photo shoots. Prior to this, I’ve been taking photos purely for the love of the series.
 “Holy crap! They’re re-enacting a scene from teh aniem!”
It was a case of, “Omg, you’re from Naruto and your costume looks cool! Can I please take your photo?” For a good majority of people going to conventions today, this is still the top reason why you’d ask a cosplayer to stop in their tracks and take a few snaps. That’s how it started. After a while human tendency to collect sets start to take over and you think, “wouldn’t it be cool if I can take a picture of Naruto with Sasuke and Sakura?” Pretty soon you just gotta catch ‘em all!
Cosplay meets provided people the opportunity to cosplay outside of conventions. I was probably part of the crowd before they were just cosplay meets and were more general anime fandom gatherings. In these more intimate outings people no longer just kept the photos for their own collection. Initially the line between cosplayer and photographer wasn’t clear. Everyone had a camera and everyone cosplayed in some form or another.
 Back in the days when I was a cosplayer myself. Doing shoots before I even called them “shoots”.
That all changed once the cosplayers dared to be more adventurous with their creations. The costumes became more complex, took longer to make and definitely cost more money. It was inevitable then that they would like their creations to be preserved in perpetuity and photography was the easy solution. Anyone with an SLR became a cosplayer’s best friend.
From my experience, I began to not just take pictures of cosplayers; it became a goal to take good photos of cosplayers. You ramped your efforts up, you tried more gear and you studied up on more techniques that are appropriate for each shoot. Eventually you’ve amassed enough experience and produced results that instead of you asking a random cosplayer in the middle of a convention for their photo, it is the cosplayers that approached you to do a shoot with them. The cosplay photographer is born!
 Magi studio shoot with lots of post processing involved.
I can’t say that I take pictures of random cosplayers in conventions anymore apart from ones that I deem useful for the articles I write for ANN. But the need in me to keep collecting still remains though these days it’s more to do with pushing the boundaries of my photography. It’s become about trying techniques that I haven’t done yet. It’s about doing shoots with popular cosplayers you’ve never worked with before. If we’re talking about fun here, cosplay photography is immense fun because it is practically a video game. I guess the only question is, when can you say that you’ve won the game.
-
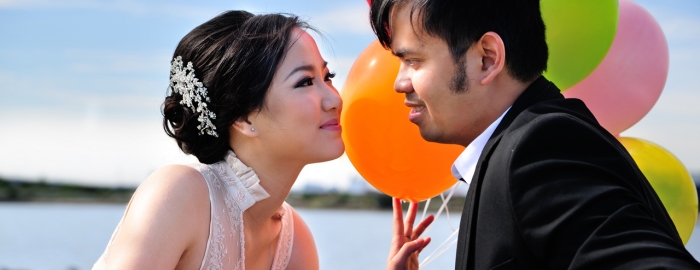
Balloons
My brother got married in late April and a few weeks before this they asked me to do a pre-wedding shoot with them as is common practice these days with most couples wanting to get married. It’s something that alleviates the stress of having to do an actual shoot during or after the wedding itself when there are already too many things happening to begin with.
This was taken as a HDR photo and I’m quite glad that I think it doesn’t look too obvious that it is a HDR. The sun was pelting down hard on that day and so it was always going to cast very strong shadows in the shades and over-expose everything else. We had planned a long day of shooting so rather than opt to carry bulky reflectors, I thought this was going to be a good way around the exposure problem.
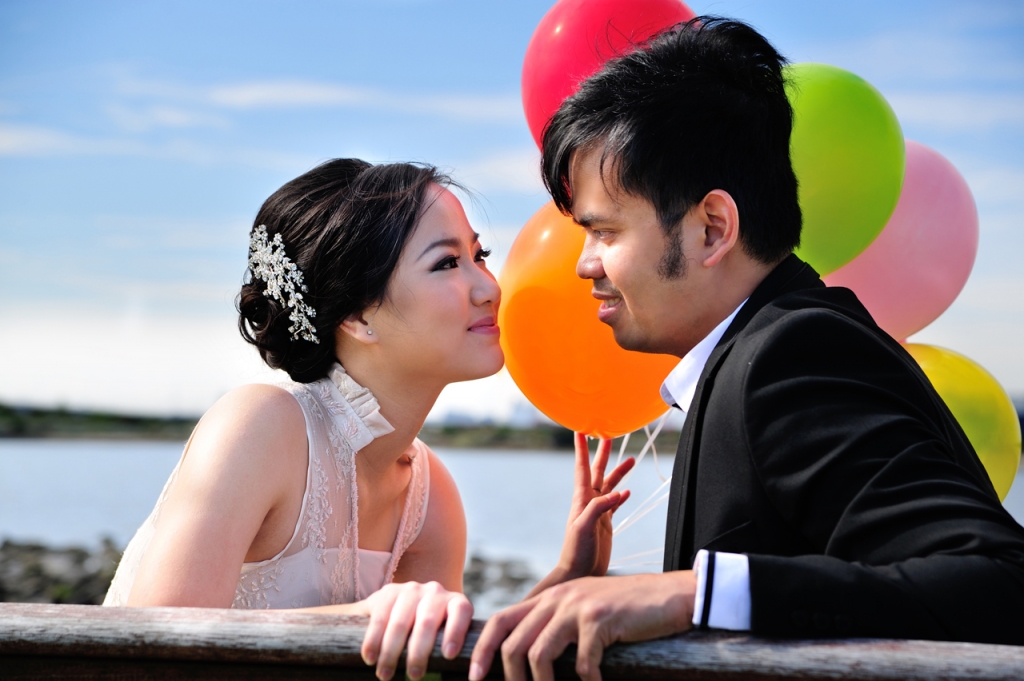
Of course, when you apply one solution, a different set of problems arise. It made for an easy shooting method, but post-processing definitely was no picnic. Balloons don’t like to remain still when faced with a breezy day at Williamstown and HDR doesn’t particularly work easily when you have too much difference from frame to frame. In the end I’ve had to resort to manually bringing up each layer rather than using an automated program.
All up, the entire day was about 8 hours worth of shooting, 4 wardrobe changes, many kilometres of driving (and walking around the city) and lots of balloons released into the the sky. By the end of it we were well and truly knackered but we got what we wanted!
-

Glittering Crux
I’m a person that’s all about salvaging something out of any situation, no matter how wrong it might have turned out. There are always moments when you’ll need to give up but it’s a satisfying experience when you actually create something that in technical terms was a failure to begin with.
The photo below is from a Star Driver shoot (my fourth one, if memory serves me correctly) a few months ago. I had three flashes set up; key light is on the front right corner, fill light on the front left and one flash in the back right pointing parallel to them for rim lighting and illuminate the fog. As (bad) luck would have it of course, the key light kept misfiring all day (and I was down to my last set of batteries). Click here for the original result.
To be honest, though the original photo was technically a mistake, I actually liked it as it was anyway. So I had a choice, upload it as it was or try to see what I can achieve with image editing. After I realised that I can bring out more detail from the shadows and end up with this more dramatic rather than just foreboding shot like the original was, I didn’t look back.
I’m definitely guilty of over-editing photos (which I never end up releasing) but maybe in the end I can’t be blamed for doing so when it can yield results that end up mesmerising me.